Note: If the class walked through the Cretan labyrinth, they would all end up in the center, at level 8. This is not practical. So the class will draw the labyrinth in rectangular form, with the entrance at the top and the exit at the bottom. Interested students can reconstruct the round form of this labyrinth. It would also be twice as large, and hard to fit in a classroom. (If the class had devised a 6 or 8-level maze, the round form would be fun).
 On the board. The class can help you do this.
The first picture you get will be the
maze path. The walls of the maze will be drawn around it.
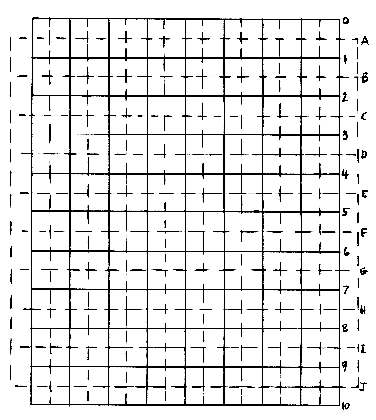
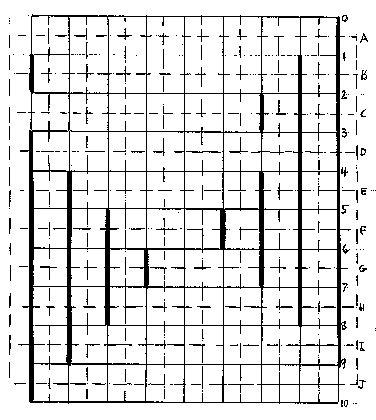
 The segments above the numberline should be transferred
to vertical lines on the right side of the grid, but
reordered so that the longer segments lie to the right.
The segments below the numberline should be transferred
to vertical lines on the left side of the grid, but
reordered so that the longer segments lie to the left.
The picture shows this stage for the maze 0 9 4 7 6 5 8 1 2 3 10.
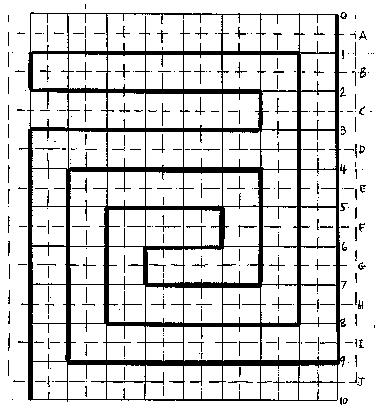
 Now, except for 0 and 10, there should be two segment
ends at each level. Join them with a horizontal line in the grid. This
is the maze-path.
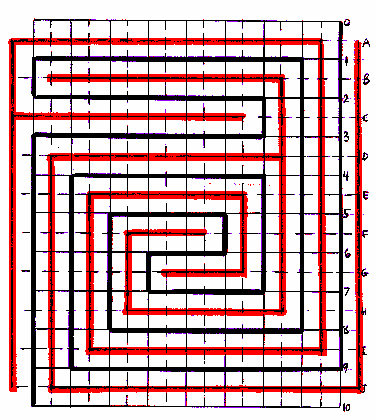
 Now draw the walls of the maze using the extra, different-colored
lines.
There will be one wall on the extreme right, and one
on the extreme left, each extending from from the A level to the
J level; there will be one all the way across the top except
at the extreme right where the path enters, and one all the
way across the bottom, below level 9, except at the extreme left
where the path exits. Fill in the rest of the walls to separate
nearby parts of the path.
Have the students take off their shoes. You take off yours, too! Have the students lay down the paper (use masking tape to hold it down and to protect edges between strips) and guide them in transferring the design from the board to the floor. Note that you will transfer the walls (red in our picture) and not the path. It may be useful to block out horizontal levels A, B, C, ... , J approximately 18 inches apart.
The Perambulation. Get a volunteer to lead the class
through (someone creative but sane). Play the music.
Back to previous page
Return to Main Maze Page
Return to Tony's Home Page